Vegetables for Central Texas
Growing your own vegetables can be quite rewarding. It can also be very frustrating here in Central Texas. We have many
insect pests and problems with high heat and drought. Many vegetables can be grown in the cooler weather of fall, winter,
and spring. See my book,
Cool-Season Gardening in Central Texas
on Amazon for suggestions of how to grow cool
season vegetables.
Vegetables to grow in cooler weather:
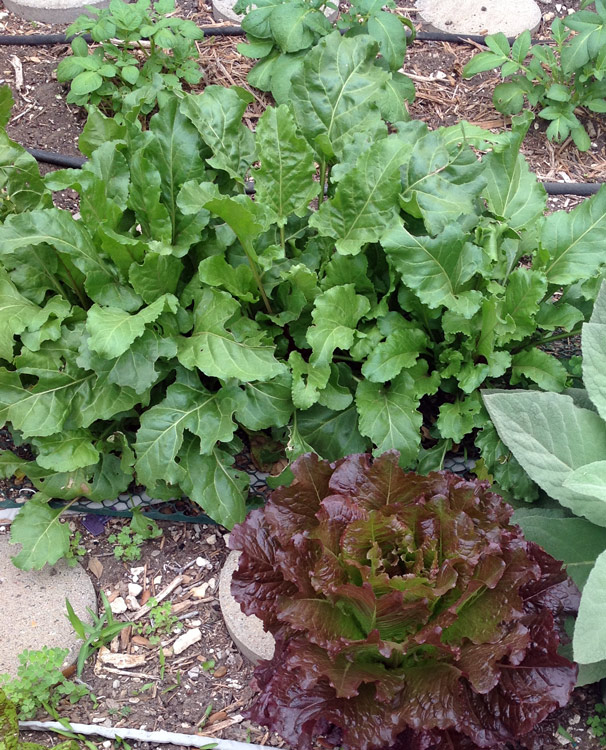
Kale, lettuce, greens, Chinese greens, radishes, and carrots--you can plant all these in the fall when the weather
starts to cool off probably toward the end of September. All of these are planted from seeds. You will find many more
varieties to try by buying them from seed catalogs rather than at your local stores.
Broccoli and cauliflower are planted in the fall or early spring. It is best to cover these crops with fabric row
cover both to give them more warmth during the winter and to prevent moths from laying their eggs on them. The dreaded
green caterpillars can be kept at bay with fabric row cover.
Root crops are also cool season vegetables. If you want to have large onions you have to plant them in the fall or
late winter. Garlic is also planted in the fall for a spring harvest. Potatoes must be planted in the spring no
later than Valentine's Day. Harvest around the time the kids get out of school
for the summer.
Click this link to see the steps to correctly plant
broccoli transplants into the garden.
Asparagus: Although asparagus is traditionally planted from late January to
early February, you must be patient, for you will not be picking any for two
years. The asparagus roots need time to get established. Keep in mind that
the wait is worth it; just remember how much asparagus costs at the food
store. If you are patient you will have all the asparagus you want at a
modest cost in time and money. Purchase good asparagus roots from a
reputable nursery and plant them in well-prepared soil. Water them as needed
and add fertilizer on a planned schedule. Shoots will emerge from the roots
during the spring. Let the shoots “fern out” and continue caring for them.
In the second spring following planting, you can begin cutting the larger
shoots. Let the shoots grow to about six to eight inches and carefully cut
them at the base. Enjoy. Once hot weather arrives, stop harvesting the
shoots and let the asparagus shoots fern out. The following fall you can
again cut newly emerging shoots, but don’t cut the existing ferns.
Beans: Various kinds of beans are planted in spring once the weather has warmed up, but before it gets very hot. Make succession
plantings so that you do not have all your beans mature at one time. Moderate fertilizer, ample water, and
vigilance in controlling spider mites is necessary. A second planting can be made in the fall for harvest just before the
first frost.
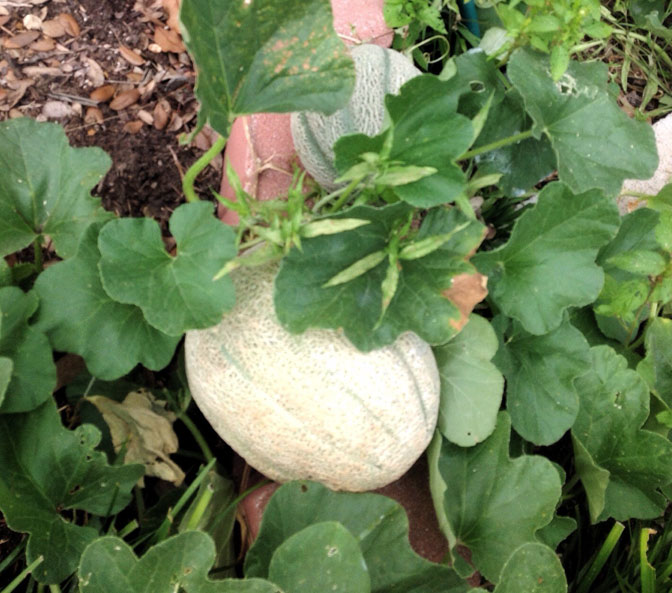 Cantaloupes: Cantaloupes and watermelons make a great addition to the
garden, as they provide vitamin C In larger
amounts than most vegetables. A rich garden soil in full sun will help these to grow well as long as you provide
a deep, regular watering. Keep an eye out for pests, including pill bugs, which
enjoy eating them as much as we do. Pill
bugs will be on the bottom of the melons where they can hide from the sun. Raising the melons off the ground can help.
Cantaloupes: Cantaloupes and watermelons make a great addition to the
garden, as they provide vitamin C In larger
amounts than most vegetables. A rich garden soil in full sun will help these to grow well as long as you provide
a deep, regular watering. Keep an eye out for pests, including pill bugs, which
enjoy eating them as much as we do. Pill
bugs will be on the bottom of the melons where they can hide from the sun. Raising the melons off the ground can help.
Okra: our beloved soup vegetable, okra thrives in the brutal summer heat of Central Texas. If you can find a spineless variety you will
have fewer unpleasant encounters with this vegetable while harvesting it.
Peppers: Both hot peppers and sweet peppers will grow better when there is ample rainfall. You can
plant them in the spring, and get a good harvest. Then they will slack off and not produce much until it
gets cooler in the fall. The fall harvest of peppers will probably be the best you will have all year round.
Summer squash: Don't limit yourself to just the yellow squashes, There are many delightful flavors and shapes to
explore. Peruse the pages of several seed catalogs and pick out some interesting squash
varieties to try this year. Squash plants need fertilizer and water at
appropriate intervals. If your squash suddenly wilts and dies, it probably
has been invaded by the dreaded squash borer.
Tomatoes: Considered the most popular vegetable grown in the United States, nothing
else in the gardening world gives
quite the thrill as growing a successful crop of tomatoes. It is a daunting task here, as there are many
disease and insect pests that will attack our beloved tomatoes. Plant in rich garden soil, fertilize
once a month, and water by drip irrigation. Keep an eye out for spider mites and leaf footed bugs,
two of the greatest foes of tomatoes. Treat them early or they will get out of hand quickly. A forceful
spray of water on the bottom of the leaves will help to destroy a light
spider mite infestation early in
the year. Later, you can try neem oil. This insecticide is natural (approved
for organic gardening) and also helps with some plant diseases (read the
label). You will
need to spray probably once a week. If all else fails, turn to a more powerful insecticide that can be used
within three days of harvest, and follow the directions carefully!
Step by step guide to planting broccoli transplants into
the garden bed:
-
 Even
though this is a step by step guide for planting broccoli, it also
applies to planting any transplant into the garden, even flowers.
Even
though this is a step by step guide for planting broccoli, it also
applies to planting any transplant into the garden, even flowers.
-
Plant at the right time of the year. For cool season
broccoli, that means mid fall or early spring.
-
Plant only in well-prepared soil.
-
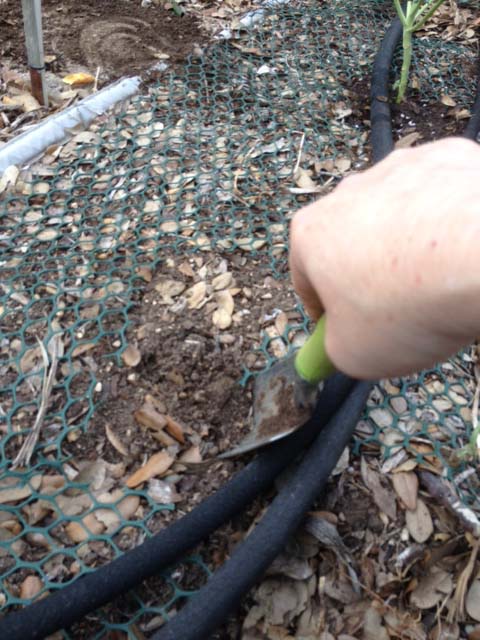
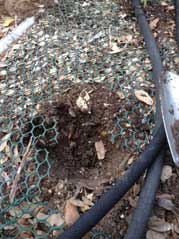
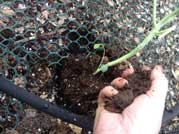
The soil in the photo shows a protective cover over
the soil made from plastic chicken wire. It is a great proctection to
prevent animals from digging in the garden. To insert a transplant, cut
a hole slightly larger than the rootball, then dig a hole for the
transplant. Set the soil dug out of the hole to one side.
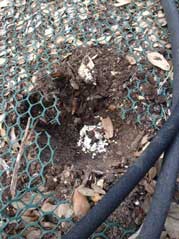
Add a tablespoon of nitrogen fertilizer to the hole,
then mix well. I prefer ammonium sulfate.
Stir the nitrogen into the soil so it doesn't burn the roots.
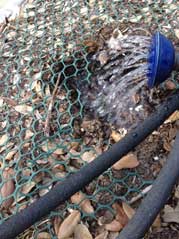
Pour water to fill the hole.
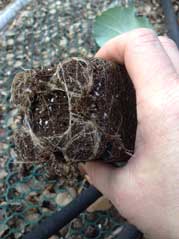
Gently loosen plant from its container and examine it.
If the roots are winding around the plant, pull them apart.
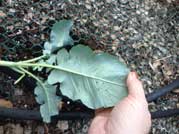 Examine the leaves for insects or insect eggs and remove.
 Put the plant in the wet hole and fill in around it
with the soil you set aside.
Put the plant in the wet hole and fill in around it
with the soil you set aside.
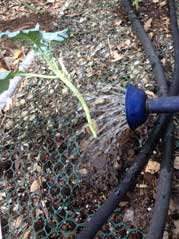 Water again to settle the plant and remove air pockets.
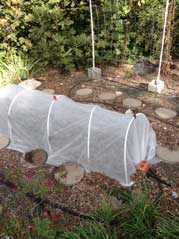 Cover cole crops with fabric row cover secured to
hoops and weigh down with rocks, bricks, and plastic clips.
Cover cole crops with fabric row cover secured to
hoops and weigh down with rocks, bricks, and plastic clips.
